Using the ListX module to create a database-driven master-detail interface on a single web page
Warning: This article assumes that you're aware of the ListX module by Bi4ce and that you have a basic understanding of what this module does, as well as a basic understaning of what DotNetNuke is. This article requires you to have the ListX module installed in your DotNetNuke portal.
Needless to say I am not a Bi4ce employee, I have just been using ListX and I'm thrilled about what this module can do - ListX lets you effortlesly pull data from any data source into DNN and present it the way you want - even use AJAX to do it.
The title may seem complex at first, but in fact what I would like to demonstrate is the exciting functionality of the ListX module with which not only can you issue custom queries (for tables inside your own DotNetNuke database or for any other source) and display results as a grid or repeater-like style, but you can also easily create detail pages - AJAX-enabled - which can reflect your choice in the "master" part without even having to reload the current web page.
First of all, we'll need a table to pull our data from. For the sake of simplicity, we'll just use an existing DotNetNuke table which will contain data even in a default installation: The Tabs table. The Tabs table contains information about our DNN pages, i.e. the title, the id and so forth. In a default installation, the table is filled with our default page info along with all the administrative pages for the Admin and Host accounts. Of course, nothing stops you from using your own table that you may create inside your DNN database or even a table from an external database. ListX supports it all.
Let's just mention the SQL we'll be using to retrieve list and detail data, we'll be using the statements later in our respective ListX instances.
Query 1: The query that we'll be using to present a list of available entries for the Tabs table
SELECT tabid AS pageid, tabname FROM tabs ORDER BY tabname DESC
Query 2: the query that we'll be using to present the details of a record
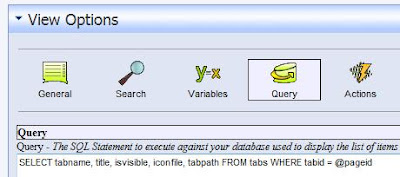
SELECT tabname, title, isvisible, iconfile, tabpath FROM tabs WHERE tabid = @pageid
If you're curious about the @pageid thing, have in mind that, when using the query in ListX, this will represent a parameter which will be replaced at runtime with the given tab id. The tabid field is a primary key for the Tabs table, so we're using this WHERE clause in our details query to ensure that it will return the requested record and that it'll be one and only one record.
Also notice that in Query 1 we give the alias "pageid" to the column "tabid". This is done because "tabid" is already a querystring parameter in DotNetNuke and we wouldn't like our Details module to confuse this querystring parameter for our own. More details on this will follow.
Finally, notice that in the details query we're just pulling some more columns from the Tabs table. I'm trying to keep this simple, so I'm not pulling too many columns - just enough to show a visual difference between list data and detail data.
It's time to create our first ListX component which will be the "master" part of our Master-Detail interface. Just add a ListX instance on any page you like (no details on that! If you're reading this you know how to do that! :).
- Click "View Options" on your new module's drop-down menu and you'll be transferred to the View Options page.
- Click the "Query" icon to show the Query section and query no.1 like this: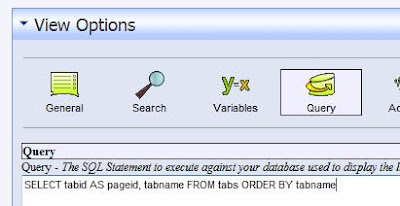
- Click "Save and Continue".
- Click the "Format" icon (you can click the "Query" icon a second time to hide the Query section).
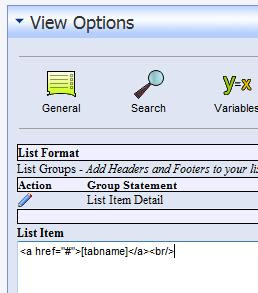
Our next step is to define the template for showing our data. Click the pencil next to "List Item Detail" to edit the list item detail template and define a very simple template, like the following:
Note that this template doesn't provide us with any links in order to connect with the Details part of our page, but we'll add the markup for that later.
- Click "Save and Continue".
- Click on the "Format" icon again to make the section hide, if you like.
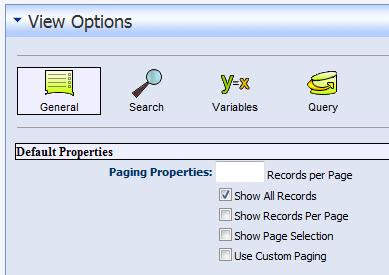
For now, we'll finish by checking the "Show all records" checkbox on the General section of the View Options page for our module, so that we can see the records. Click the "General" icon and check the "Show All Records" checkbox, as in the picture:
- Click "Save Configuration" to return to your page.
That's how our first result will look like:
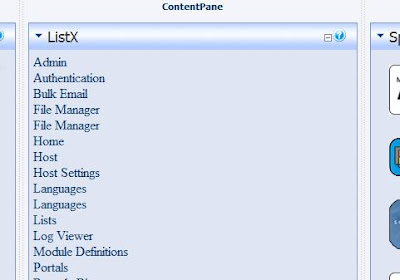
So we've got a list which comes from a query made on our Tabs table, which contains links that lead nowhere - for the time being. Let's start preparing our second ListX module instance - the details section. For that, we'll have to add another ListX instance on our page, directly beneath the first one. So, add a second ListX instance now.
For reasons of not being too verbose, I'll be skipping the steps on how to go to the various sections of the View Options page from now on. Be sure to click "Save and Continue" after you have finished a series of actions so as not to accidentally lose your configuration.
Working with our second ListX instance (the "detail" instance), we must also specify a query to pull data from our Tabs table. We'll use Query no.2 here, as follows:
and a simple template in the Format section under List Item Detail for presenting our data:
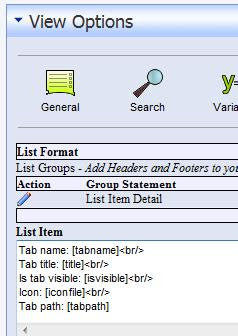
As usual, don't forget to check "Show all records" in the General section of our second module's View Options.
This is going to present us the details of a record selected in our first ListX module instance - but in order for this to work, we need to define one more thing in our Detail instance: The @pageid query parameter. This parameter will be coming from the QueryString (that's the way ListX works), so we've got to issue something like the following in the Variables section of View Options:

Details on how to do that (need to be a bit more explanatory here):
- In View Options, click the "Variables" icon.
- The Variables interface appears. Click "New Query Variable"
- Choose "QueryString" as the variable type from the Variable Type combo box
- Enter "pageid" at the Source textbox
- Enter "@pageid" at the Target text box
- Click "Save"
Remeber what I told you about querystring parameters? Tabid is already a querystring parameter (if you're using friendly URLs you'll see it appearing as /tabid/xxx where xxx is your page's id, and if you're not using friendly URLs you'll see it appearing as /default.aspx?tabid=xxx). Whatever the case, we've GOT to use another name for our parameter, hence the AS alias in our Query no.1 in the first place in order to be concise with the naming.
- Click "Save Configuration". You will return to your page.
What we did was to define a variable that will be contained in the querystring and will have the name "pageid". The value of that variable will go into the query parameter @pageid (remember our query?) so essentially our WHERE clause will get a record with a specific tab id.
But hold on. Aren't we supposed to make our first (master) module instance communicate in some way with our second (detail) instance and pass that variable?
Yes, we are. Since we've got the tab id value for every record in the first place (remember Query no.1), now it's the time to use it. Let's go to our first module's View Options and edit the Template section as follows:
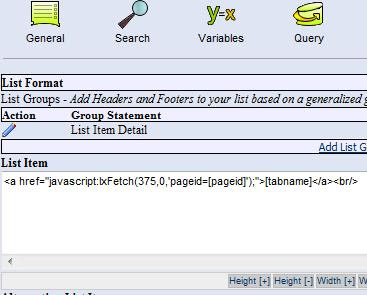
Notice the HREF part of our link. The lxFetch function is a JavaScript function defined by ListX and, in short, refreshes a given module passing it any number of name/value pairs for querystring variables needed.
The first argument is the module ID of the module we want to refresh (fetch). There are a number of ways to get to know the module number, the simplest of which is to look for the "mid" parameter value in our querystring when in View Options or Module Settings for our ListX module. In our case, our Detail module's id is 375.
By clicking on any link on the first ListX module, the contents of the second ListX module change reflecting the selected record's details without the page being reloaded.
Of course, there are some more issues like what you can show when the page first loads (when there's no selected record), which are beyond the scope of this article. It's easy, though, to have the second module hidden at first, or have it present a message like "Please select a record".
Happy ListX'ing!
 Read more...
